

Avepo Agrovets Limited
Farmer Tips
Disease control, pest control, seed choices, and more — straight from our agronomists.
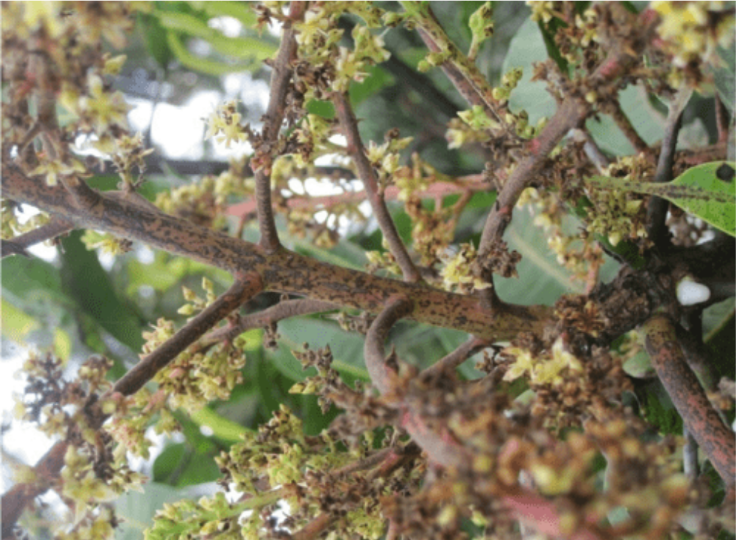
Identification, Symptoms and Management Mango blossom blight is a fungal disease that affects mango flowers and young developing shoots. It can cause significant flower loss, poor fruit set and reduced mango yields, particularly when conditions are warm, humid and wet during the flowering period. The disease should be managed early because damage to the flowers can directly affect the number of fruits that eventually develop. Symptoms of Mango Blossom Blight The disease mainly affects the flower panicles, although young shoots and other tender tissues may also be affected. Common symptoms include: ● Browning or blackening of flower panicles. ● Flowers drying and dying before fruit set. ● Dark lesions on flower stalks. ● Blighted or dried flower clusters. ● Premature flower drop. ● Reduced fruit set. ● In severe cases, drying back of young shoots. Under favourable conditions, the disease can spread rapidly through the flowering panicles. Conditions That Favor Mango Blossom Blight Mango blossom blight is favoured by high humidity, frequent rainfall, prolonged wetness and poor air circulation within the canopy. Disease pressure can therefore be particularly high during wet flowering periods. Management of Mango Blossom Blight Effective management involves regular monitoring, good orchard sanitation, canopy management and timely fungicide application. Recommended Fungicides The following fungicides are included in the management programme: Absolute Star 10 ml Chariot 20 ml Pearl 20 ml Greencop 50 gm Trinity Gold 50 gm Ortiva 20 ml Always follow the current product label for the approved crop, target disease, application rate, pre-harvest interval and safety requirements. Cultural Management Practices 1. Monitor During Flowering Begin regular inspection of mango trees as flower panicles emerge. Pay particular attention to early signs of browning, drying or blackening of flowers. 2. Maintain Good Canopy Management Prune appropriately to improve air circulation and light penetration within the mango canopy. A well-managed canopy dries faster after rainfall or dew, reducing conditions favourable for fungal infection. 3. Remove Infected Material Where practical, remove severely infected flower panicles and other affected plant material and dispose of them properly to reduce sources of infection. 4. Maintain Orchard Sanitation Remove fallen leaves, flowers and diseased plant material from around the orchard where appropriate. 5. Apply Fungicides at the Right Time Fungicide protection is most useful when applied before disease becomes severe, particularly when weather conditions are favourable for infection. Protecting flowers during the flowering period is important because severe blossom infection can result in poor fruit set.
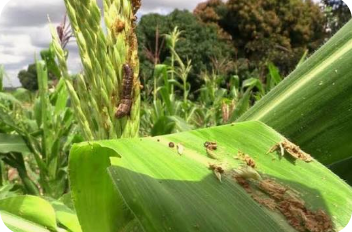
Identification, Crops Affected, Damage and Management Fall armyworm (FAW), Spodoptera frugiperda, is a highly destructive insect pest that mainly attacks maize but can also feed on many other crops. It can cause serious yield losses, especially when infestations occur during the early stages of crop development. Crops Affected by Fall Armyworm. Although maize is one of its major hosts, fall armyworm is a polyphagous pest, meaning it can feed on many different plant species. Crops that can be affected include: ● Maize ● Sorghum ● Wheat ● Rice ● Millet ● Sugarcane ● Other grasses and cultivated crops The severity of infestation varies depending on the crop, growth stage and prevailing environmental conditions. Fall armyworm larvae vary in colour from light green to brown and usually have longitudinal stripes along the body. A key identification feature is the inverted Y-shaped marking on the head. Mature larvae also have four dark spots arranged in a square-like pattern on the last abdominal segments. Adult moths are mainly active at night. Therefore, regular inspection for eggs, young larvae and feeding damage is important for early detection. Damage Caused by Fall Armyworm Young larvae initially feed on the leaf surface, creating small transparent or window-like patches. As they grow, they move into the maize whorl where they cause more severe feeding damage. Common signs of infestation include:● Small holes and window-like patches on leaves. ● Irregular feeding damage. ● Ragged or heavily damaged leaves. ● Fresh frass (insect droppings) inside the maize whorl. ● Damage to the growing point. ● Reduced plant growth. ● Severe damage that may result in plant death, especially in young plants. Young larvae are generally easier to control because they are more exposed. Older larvae may be difficult to reach when they are deep inside the maize whorl. Natural Enemies of Fall Armyworm Fall armyworm has several natural enemies that can help reduce its population in the field. Protecting these beneficial organisms is an important part of integrated pest management. Examples include: Birds Some insect-eating birds feed on fall armyworm larvae and moths. Maintaining a healthy farm ecosystem can help encourage their presence. Earwigs Earwigs are beneficial predators that can feed on fall armyworm eggs and young larvae. Praying Mantises Praying mantises are generalist predators that can feed on various insects, including caterpillars and moths. Bats Bats can feed on adult moths, particularly during their active periods at night. Their presence can contribute to natural suppression of adult populations. Cultural and Biological Management Fall armyworm management should not rely entirely on insecticides. Combining cultural practices, natural enemies and timely chemical control can provide better and more sustainable management. 1. Early and Timely Planting Planting within the recommended planting window can help crops establish and develop before pest pressure becomes severe. Avoid unnecessarily delayed planting where local conditions favour fall armyworm build-up. 2. Hand Picking and Destruction During early infestations, farmers can inspect plants and hand-pick and destroy egg masses and young larvae where practical, particularly on small farms. Egg masses should not simply be moved to another part of the field. They should be properly destroyed or disposed of to prevent hatching. 3. Intercropping with Legumes Intercropping maize with suitable legumes such as beans can help increase crop diversity and may make the crop less attractive to egg-laying adult female moths. The presence of different plant species can interfere with host-finding behaviour and may reduce the likelihood of female moths laying eggs on maize. However, intercropping should be used as part of an integrated programme rather than relied upon as a stand-alone method. 4. Regular Field Scouting Inspect maize regularly, particularly the whorl and newly emerging leaves. Look for: ● Egg masses ● Small caterpillars ● Window-like feeding marks ● Holes in leaves ● Fresh frass inside the whorl Early detection makes management much easier. Chemical Management Where fall armyworm populations reach damaging levels, appropriate insecticides can be used as part of an integrated management programme. The following products are included in the management programme: Escort 25ml Relay 4ml Amigad 10g Benzoron 3ml Nomax 20ml Diazol 40ml Duduthrin 60ml Cyclotron 10ml Pentagon 10ml Umeme Top 10ml Important Application Note For improved spray coverage and performance, a suitable sticker/wetter/spreader may be used together with the insecticides. The following adjuvants are included in the spray programme: Aquawet – 10 ml/20lof water Integra – 3 ml/20l of water Golden Leaf – 3 ml/20l of water HiSpied – 3 ml/20l of water
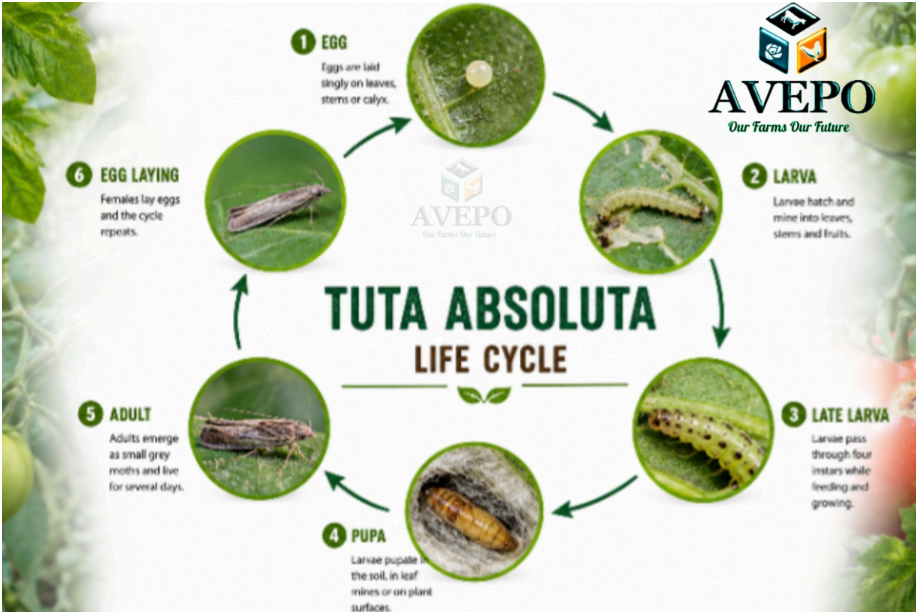
Identification, Crops Affected, Damage and Management Tuta absoluta, commonly known as tomato leaf miner or tomato pin worm, is one of the most destructive insect pests of tomato. It is a small moth whose larvae feed inside leaves, stems and fruits, making the pest difficult to manage once an infestation becomes established. The pest can multiply rapidly under favourable conditions and cause significant losses in both open-field and protected tomato production. Crops Affected by Tuta absoluta Tuta absoluta mainly attacks crops in the Solanaceae family, particularly: ● Tomato ● Potato ● Eggplant ● Other related solanaceous crops Tomato is one of its most important hosts. Identification Adult Moths Adult Tuta moths are small, greyish-brown moths with narrow wings. They are more active during the evening and night and may hide among the foliage during the day. Larvae The larvae are small caterpillars that feed inside plant tissues. They can be difficult to detect because they spend much of their time protected inside leaves, stems and fruits. Eggs The eggs are very small and are usually deposited on leaves, stems and other plant parts, making them difficult to identify without close inspection. Damage Caused by Tuta absoluta The larval stage causes the greatest damage. Larvae penetrate leaves, stems and fruits and create galleries as they feed. Common signs of infestation include: ● Irregular mines or tunnels on leaves. ● Transparent or brown patches on leaves. ● Leaf drying and premature leaf drop. ● Damage to young shoots and growing points. ● Tunnels inside stems. ● Holes and tunnels in fruits. ● Fruit rotting following secondary infections. ● Reduced fruit quality and marketability. ● Severe infestations can cause significant yield losses. Fruit damage is particularly serious because it directly reduces the amount of marketable produce. Management of Tuta absoluta Effective management requires an integrated pest management approach combining regular scouting, trapping, field sanitation, removal of infested plant material and timely insecticide application. Recommended Insecticides The following products and rates are included in the management programme: Tihan 10 ml Fenari 10 ml Relay 4 ml Benzoron 3ml Occasion Star 3ml Campostella 9ml Proper timing is important. Control is generally more effective when the pest is detected early, before extensive leaf mining and fruit damage occur. Tuta Traps Tuta traps can be used to monitor and reduce adult Tuta moth populations. The traps help farmers: ● Detect the presence of Tuta moths early. ● Monitor changes in pest populations. ● Reduce the number of adult moths in the production area. ● Support timely decision-making on pest management. Traps are most effective when incorporated into an integrated management programme rather than being relied upon as the only control method. Nimbecidine in Tuta Management Nimbecidine can be incorporated into the management programme alongside recommended insecticides. Nimbecidine contains neem-based compounds and can contribute to pest management through several effects, including: ● Insect growth regulation ● Sterilant effects ● Oviposition deterrence, discouraging female moths from laying eggs ● Anti-feeding activity, reducing feeding by developing larvae Using Nimbecidine as part of an integrated programme can help reduce pest pressure and may support longer spray intervals, depending on pest pressure, crop stage and environmental conditions. Do not automatically extend spray intervals simply because Nimbecidine has been added. Always scouting the crop and adjusting the spray programme according to pest population and product-label recommendations. Cultural and Preventive Management 1. Regular Scouting Inspect tomato plants frequently, paying particular attention to young leaves, growing points, stems and fruits. Look for fresh mines, larvae and damaged fruits. 2. Use Tuta Traps Install appropriate Tuta traps early in the production cycle to monitor adult moth activity and detect increasing populations. 3. Remove Infested Plant Material Where practical, remove heavily infested leaves and destroy them properly. Do not leave removed plant material beside the crop because larvae can continue developing. 4. Destroy Infested Fruits Collect and destroy severely infested fruits that cannot be marketed. Leaving them in the field allows the pest to complete its development and produce another generation. 5. Maintain Field Sanitation Remove crop residues and volunteer tomato plants after harvesting. These can provide shelter and breeding sites for Tuta absoluta. 6. Control Alternative Hosts Manage weeds and other host plants around the field that may harbour the pest between production cycles. Insecticide Resistance Management Tuta absoluta is capable of developing insecticide resistance, particularly where the same insecticide or mode of action is repeatedly used. For better long-term control: ● Rotate insecticides with different IRAC modes of action. ● Avoid repeated use of the same product or mode of action. ● Apply products at the recommended label rate. ● Avoid under-dosing. ● Scout regularly and spray when intervention is justified. ● Observe the recommended application interval and pre-harvest period. Use of Sticker/Wetter/Spreader Where permitted by the product label, a suitable sticker/wetter/spreader can be used with insecticides to improve spray wetting, spreading, coverage and retention on plant surfaces. Adjuvants included in the spray programme are: ● Aquawet – 10 ml/20 L ● Integra – 3 ml/20 L ● Golden Leaf – 3 ml/20 L ● HiSpied – 3 ml/20 L Farmer Tip Scout early, trap adult moths and act before Tuta absoluta becomes established.
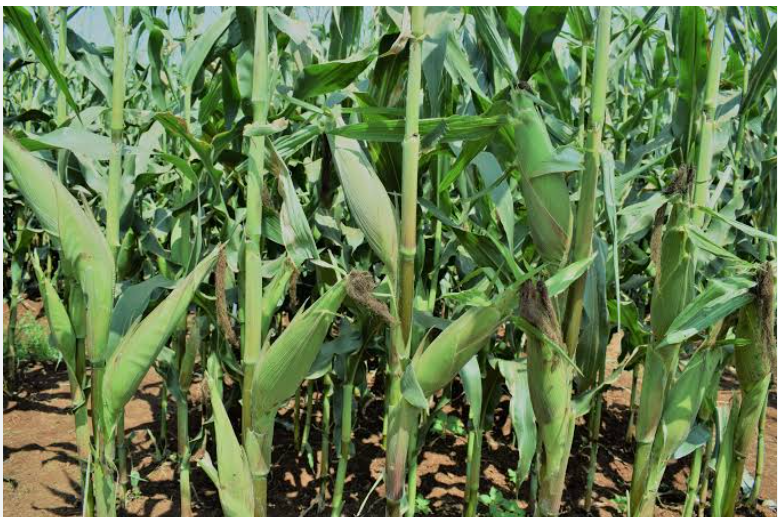
Maize is one of Kenya's most important food and commercial crops. However, good yields do not happen by chance. Successful maize production starts with proper land preparation, the right variety, correct spacing, balanced nutrition, timely weed and pest management, and proper post-harvest handling. This guide provides a practical maize production programme from land preparation to storage 1. Land Preparation Good maize production starts with a well-prepared field. The objective is to create a suitable seedbed that allows good germination, root development, water infiltration and effective weed management. Before planting: ● Clear the field of unwanted vegetation. ● Prepare a fine, well-drained seedbed. ● Correct soil acidity where necessary. ● Incorporate well-decomposed organic manure where available. ● Conduct a soil test to determine soil fertility and fertilizer requirements. Herbicides for Land Preparation Where herbicides are appropriate, farmers can use products such as: ● Roundup Turbo ● Catapult ● Weedless ● Kausha ● Weedal ● Kick-Out ● Roundup Classic ● Rid-Out ● Debar Always follow the product label regarding application rate, target weeds, safety precautions and pre-planting requirements. 2. Soil Testing and Fertilizer Selection A soil test should be done before planting to establish the nutrient status of the field. A soil test helps determine: ● Soil pH ● Nitrogen status ● Phosphorus status ● Potassium status ● Sulphur and micronutrient levels ● Lime requirements ● Suitable fertilizer options Don't apply fertilizer based on guesswork. Apply according to your soil-test results and the nutrient requirements of your crop. The fertilizer requirement of one farm can be very different from another, even when the same maize variety is planted. 3. Choosing the Right Maize Variety There is no single maize variety suitable for every farm. Variety selection should consider agro-ecological zone, altitude, rainfall pattern, maturity period, disease tolerance, drought conditions and market requirements. Maize varieties Some maize varieties available to farmers include: 1. SC Duma 447 2. SC Duma 43 3. DK8031 4. DKC8033 5. PAN 3M-05 6. DH04 7. TSAVO 4141 8. TOSHEKA MH401 9. MITUKI KDH3 10. H513 11. SAWA 12. SC Pundamilia 555 13. Pioneer 30G19 14. DK777 15. HARAKA 101 16. HARAKA 301 17. TSAVO 3106 18. RS 5101 19. ADV2308W 20. DK9089 21. ETG MH601 22. SC Tembo 73 23. ETG MH401 24. SC Simba 61 or other variety(ies) recommended for your area. How to choose Before purchasing seed, consider questions like: Where am I farming? → What rainfall do I expect? → How long is my growing season? → What maturity period do I need? → What pests and diseases are common in my area? → What does my market require? 4. Planting Plant maize when there is adequate and reliable soil moisture. Timely planting allows the crop to establish properly and take advantage of the available growing season. Recommended spacing ● Between rows: 75 cm ● Between plants: 25–30 cm ● Planting depth: 5–7 cm(not too deep and not too shallow) ● Seed placement: 1 seed per planting hole Approximate plant population Spacing Approximate population/acre 75 cm × 30 cm 17,800 plants 75 cm × 25 cm 21,300 plants The exact spacing and plant population should consider the variety, agro-ecological zone, soil fertility, rainfall and target yield. 5. Fertilizers for Planting The choice of planting fertilizer should be guided by soil-test results. Recommended planting fertilizers include: ● Diammonium Phosphate (DAP) ● NPK MiCROP Planting ● NPK KALI Planting ● NPSB ● Triple Superphosphate (TSP) or any other suitable fertilizer(s) recommended by your field extension officer DAP Supplies nitrogen and phosphorus and can be used where soil conditions and test results indicate a need for these nutrients. NPK MiCROP Planting Provides multiple nutrients required for early crop establishment. NPK KALI Planting Provides a combination of nutrients, including potassium, where required. NPSB Provides nitrogen, phosphorus, sulphur and boron, making it useful where these nutrients are deficient. TSP A concentrated phosphorus fertilizer that can be considered where phosphorus is required. NOTE: The best planting fertilizer is not necessarily the most popular one. It is the one that supplies the nutrients your soil and crop actually need. 6. Weed Management Weeds compete with maize for water, nutrients, sunlight and space. Early weed competition can significantly reduce crop performance. Effective weed management combines: ● Good land preparation ● Timely planting ● Proper crop spacing ● Early weed control ● Manual/mechanical weeding where appropriate ● Correct use of herbicides Selective Herbicides Examples include: ● Governor 580SE ● Kolopa ● Srasher ● Succeed 280OD ● TingaTinga The choice of herbicide depends on the weed species, weed growth stage, maize growth stage and product label recommendations. 7. Crop Nutrition During Growth Maize requires nutrients throughout its growth cycle. Fertilizer application should therefore not end at planting. Good nutrition supports: ● Strong vegetative growth ● Root development ● Healthy leaves ● Tasseling and flowering ● Grain formation ● Grain filling Foliar fertilizers Where foliar nutrition is appropriate, farmers can use products such as: ● YaraVita Crop Boost ● Lavender Total ● Wuxal Macromix ● Maxigrow ● Agrofeed Plus OR any other suitable foliar fertilizers Foliar fertilizers should complement good soil fertility management, not replace proper basal and top-dressing fertilization. 8. Top-Dressing Nitrogen demand increases as maize develops, particularly during the vegetative growth stage. Recommended top-dressing fertilizers include: ● Calcium Ammonium Nitrate (CAN) ● MiCROP Topdressing ● Kynoch Plus "S" ● Urea ● YaraVera Amidas ● And other suitable nitrogen fertilizers. The choice and rate should also depend on: 1. Soil-test results 2. Fertilizer applied during planting 3. Crop condition 4. Expected yield 5. Soil type and rainfall Apply top-dressing when there is adequate soil moisture, 5cm away from the plant stem. 9. Fall Armyworm{FAW} Management Fall Armyworm is an important maize pest. Early detection and timely management are critical. What should farmers look for? Regularly inspect the maize, especially the whorl, for: ● Feeding damage on young leaves ● Ragged or windowed leaves ● Caterpillars ● Fresh frass inside the whorl ● Damage to growing points Products for Fall Armyworm control Examples include: ● Belt — 10 ml/20 L ● Relay — 4 ml/20 L ● Benzoron — 3 ml/20 L ● Amigad — 10 g/20 L ● Escort — 25 ml/20 L ● Rapid — 10 ml/20 L ● Raptor — 25 ml/20 L Or other registered options Best practice Scout → identify → assess → select → apply correctly. Do not spray simply because other farmers are spraying. 10. Other Important Maize Pests Farmers should also scout for: Cutworms Can attack young plants around the soil surface. Stalk borers Can cause dead-heart symptoms, stem damage and lodging. Aphids Suck plant sap and may cause curling, yellowing and reduced plant vigor. Early detection makes pest management more effective. 11. Maize Diseases Important maize diseases include: ● Maize Lethal Necrosis Disease (MLND) ● Maize smut ● Northern leaf blight Disease management Use: ● Certified seed ● Suitable varieties ● Good field sanitation ● Crop rotation where practical ● Proper crop nutrition ● Regular scouting ● Appropriate pest-vector management For diseases such as MLND, prevention and integrated management are more effective than waiting until the crop is severely affected. 12. Water and Moisture Management Maize requires adequate moisture throughout its growth cycle, particularly during: ● Germination ● Early vegetative growth ● Tasseling ● Silking ● Grain filling Farmers should conserve available moisture through appropriate soil-management practices. Where irrigation is available, water should be managed according to crop requirements and prevailing conditions. 13. Harvesting Harvesting time depends on the variety, planting date, weather conditions and intended use. For dry grain production, maize should be allowed to reach physiological maturity before harvesting. Avoid harvesting immature maize Premature harvesting can result in: ● High grain moisture ● Higher drying costs ● Poor storage quality ● Increased risk of mould development Harvest mature maize and dry it properly before storage. For farmers targeting the green maize market can harvest earlier, when the cobs have reached the appropriate stage for fresh consumption. 14. Post-Harvest Handling Good production can be wasted through poor post-harvest handling. After harvesting: 1. Sort the maize. 2. Remove damaged and diseased cobs. 3. Dry the maize adequately. 4. Shell where appropriate. 5. Clean the grain. 6. Protect against storage pests. 7. Store in a clean, dry and secure facility. Proper drying helps reduce mold growth, grain deterioration and storage losses. 15. Protecting Stored Maize Farmers can use chemical or non-chemical storage methods. Chemical Preservation Examples of grain-storage protectants include: ● Actellic Super ● Sumicombi ● Skana Super ● President Gold Or other registered grain protectants. Use 50 g per 90 kg of shelled maize, and for cob maize, sprinkle the dust 30cm-49cm layer of maize. 16. Non-Chemical Storage Farmers who prefer a non-chemical option can use hermetic storage bags. Hermetic bags create an airtight environment that limits oxygen availability and helps suppress insect activity. For best results: ● Dry grain properly before storage. ● Use clean, undamaged bags. ● Do not mix new grain with infested grain ● Store bags in a clean, dry place. ● Regularly inspect the storage area.

Preferred Type in Kenya The most preferred type in Kenyan Market is the Zebra type (dark green stripes) which should have: Yield Potential: 25 tons/acre Maturity: 80 – 90 days for most varieties Oblong fruits in shape Average fruit weight 7 – 10 kgs Rind: light green with dark green stripes Deep red flesh, crispy & firm TSS 11 – 12% (Total Soluble Sugar) Thick rind: Good for long distance transport Yield Potential: 25 tons/acre Climatic Requirements Long, warm growing periods Bright, hot days (27 – 35°C) Warm nights (16 – 21°C) Cool temperatures & excessive rainfall delay germination, slow growth, and cause poor fruit setting and hollow fruits High humidity increases disease susceptibility and reduces flowering Soil Requirements Sandy loam, rich in organic matter with good drainage Heavy soils slow crop development and cause cracked fruits Soil pH: 6 – 7 Apply lime if soil pH is too low Seed Requirements & Sowing Seed Rate: 500 – 600 grams per acre Single row system: Row spacing: 2.0 – 2.5 meters Plant spacing: 60 cm Double row system: Row spacing: 3.5 – 4.0 meters Plant spacing: 60 cm Manure & Fertilizer Application FYM: 5-8 tons/acre Basal: 2 bags NPK Yara Power or 2 bags DAP Top Dress: 1st: 2 bags Yara Nitrabor/Calcibor @ 25 Days after Planting 2nd: 1 bag NPK Yara Winner @ 45 Days after Planting Micronutrients Ca, Bo & Mg spray during vegetative, flowering and fruit setting stages Inter-Cultivation Crop Rotation: Use cereals, legumes, or pulses for at least 2 seasons Weeding: Regular to keep the field clean Harvesting & Yield Immature fruits have poor content Overripe fruits are fibrous Yield: Potential: 25 tons/acre under good agronomic practices Average: 15 tons/acre Irrigation: Irrigate before planting and then once a week Avoid irrigation after long dry spells (causes cracking) Most critical stages: Flowering & Fruit setting Pollination Cross-pollination by insects (especially honey bees) 1-2 bee hives per acre Best time: 9 am – 12 pm Avoid chemical spraying during morning flowering stages Poor pollination causes misshapen fruits Pest Management Major pests: Cucumber beetles, aphids, leafminers, thrips, melon flies Monitor with traps and field scouting Use pesticides based on pest population Maturity Indicators Color change from dark green to light green/yellow Drying tendrils Yellow ground spot Hollow sound on tapping
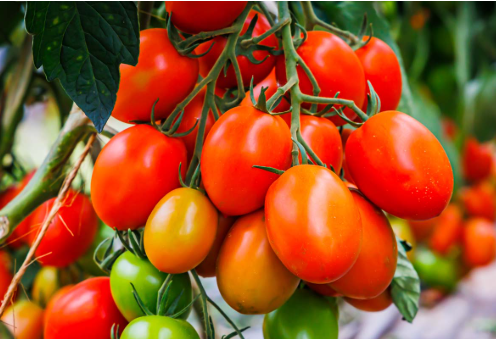
Variety Selection When choosing tomato varieties, prioritize the following: Fruit quality and market preference Resistance to diseases and tolerance to climatic conditions Growth habit (bushy or vining) Maturity period and adaptability to your region Types of Tomatoes: Determinate (Bush Type): Ideal for open fields. These grow to a certain height, set fruit once, and mature uniformly. They require minimal staking. Indeterminate (Vine Type): Commonly grown in greenhouses. These grow continuously and produce fruits over a long period. They require support structures. Recommended Determinate Varieties (Open Field) Ansal F1, Rafano F1, Raja F1, Nova, Harmony F1, Zara F1 For BW-free fields: Nyati F1, Terminator F1, Rionex, Star 9068, Kilele F1, Twiga F1, Eden F1, Ranger, Rambo F1 Ecological Requirements Water Source: Should be near the field or supported by tanks and drip systems. Crop Rotation: Avoid planting tomatoes after potatoes or pepper. Observe a 3-month break. Land Topology: Slightly sloping fields are best for drainage. Soil: Deep, well-drained loamy soil with pH between 6.0-7.5. Use lime for acidic soils and gypsum for alkaline soils. Conduct soil testing for proper fertilizer planning. Nursery Establishment Raised beds: 15cm high with 30cm walkways Fine soil texture for better seed emergence Sow seeds 1cm deep and 15cm apart Mulch to retain moisture and minimize splashing Water in the morning; germination starts around day 8 Reduce watering before transplanting to harden seedlings Drench the nursery using: Bamako/Confidor/Loyalty (10g/20L) + Ridomil Gold/Matco72/Victory/Trinity Gold (50g/20L) Transplanting Water nursery before uprooting Transplant early morning or late evening using a trowel Maintain soil ball around roots Spacing: 60cm (between rows) × 45cm (within rows) Fertilizer Application Basal: Phosphate for early root growth Topdressing: At flowering: Yara Nitrabor or Calcibor Two weeks later: NPK Yara Winner After first harvest: Mix Nitrabor/Calcibor : Yara Winner (1:2) Recommended Foliar Sprays: Goldchance Super Flowers, Omex Murex K, Yara Vita Power Boost, Goldchance Multi-K, Easy Gro Flower and Fruit Irrigation Ensure adequate but not excessive watering. Avoid waterlogging and nutrient leaching. Staking (Support) Start early after transplanting. Use poles and wires to support plants. Increases yield and reduces stem breakage. Pruning Remove suckers, side shoots, old/diseased leaves weekly. Avoid removing productive branches. Yellowing lower leaves should also be removed to prevent disease. Weed Management – Weed regularly to reduce competition and disease pressure. Pest Control Major Pests: American Bollworm, Cutworms, Red Spider Mites, Tuta absoluta, Nematodes Effective Insecticides (rotate use): Rapid 120EC, Occasion Star 200SC, Relay 150SC, MitePawa 1.8EC, Escort 19EC, Cyclotron 450EC, Lexus 247SC, Kingcode Elite, Umeme Top 50EC, Pentagon 50EC Disease Management Tomato Blight (Fungal): Symptoms: Brown patches on leaves/stems/fruits Fungicides: Ridomil Gold, Trinity Gold, Acrobat, Absolute Star, Orvego, Matco 72, Luna Sensation, Mistres Bacterial Wilt: Use certified seeds and avoid infected soil Blossom End Rot: Maintain consistent watering Apply calcium-rich foliar fertilizers: Calmabon, Calmag, Ferrari Gold Harvesting Harvest begins from 65 days after transplanting; time may vary by variety.

Mango Production Mango is one of the most important fruits in the tropics, with its industry expanding in size and geographical location. It is grown in various counties in Kenya and is consumed as fresh fruit or processed into juices and jams. Here is an in-depth guide on mango production, focusing on varieties, planting, maintenance, pests, diseases, and nutrition. 1. Varieties Various mango varieties are cultivated, each with differences in shape, color, taste, fiber content, seed size, and resistance to pests and diseases. The main varieties include: – Apple, Ngowe, Kent, Keitt, Tommy Atkins, Vandyke. 2. Planting Mangoes thrive in deep soils with a spacing of 8-10 meters and a depth of between 1 cubic meter to 0.5 cubic meters. When preparing the planting hole, mix the topsoil with a debe of manure and a compound fertilizer, preferably NPK, mixed with HUMIPOWER/BLACK EARTH (a soil conditioner) at a rate of 1 kg per 50 kg of fertilizer. 3. Maintenance *Pruning Pruning is essential for maintaining shape, size, and canopy management. There are two main types of pruning: – Formative Pruning: Done in the first year to ensure the correct shape. – Structural Pruning: Follows harvesting to improve yield and quality. After pruning, spray with CUPROCAFFARO/FUNGURAN/GREENCOP at 50g in 20L of water to manage bacterial diseases. 4. Pests To attain high yields of pest-free and high-quality mango fruits, control insect pests at all growth stages, including flushing, flowering, pinhead, early fruit development, and maturity. i. Mango Fruit Fly – Description: Causes more than 50% loss of mango fruits. Females lay eggs on the fruit’s surface, with maggots penetrating and destroying the fruit, leading to rotting and fruit fall. *Control: – LEXUS 247 SC at 10ml in 20L of water – RELAY 150SC at 5ml in 20L of water (long residue effect) – KINGCODE ELITE 50 EC/RAPID 120EC at 10mls/20L of water (Superior double-molecule insecticide) ii. Mango Seed Weevil – Description: Spread by transporting infested fruits, damaging export quality. *Control: – EMERALD 200 SL at 10ml in 20L of water. iii. Scales and Mealybugs – Description: Visible honeydew/sooty mold leads to ants’ invasion, reducing fruit quality. – *Control: – EMERALD 200 SL at 10ml in 20L of water – LEXUS 247 SC/ENGEO 247 SC at 10ml in 20L of water iv. Gall Midge – Description: Symptoms include galls on leaves, affecting photosynthetic ability. *Control: – LEXUS 247 SC/ENGEO 247 SC at 10ml in 20L of water 5. Mango Diseases Mango production faces several challenges, with fungal infections being a significant concern. Key diseases include powdery mildew, anthracnose, and rust, affecting trees during various growth stages. i. Powdery Mildew – Description: Fungal infection attacking leaves, buds, flowers, and young fruits. – Control: – ABSOLUTE STAR 400 SC/TOKEN 325 SC at 10ml in 20L of water – PEARL 500 SC/GOLDAZIM 500 SC/CHARIOT 500 SC in 20L of water ii. Mango Anthracnose – Description: Caused by Colletotrichum gloeosporioides var minor, favored by wet or humid weather. *Control: – ABSOLUTE STAR 400 SC/TOKEN 325 SC at 10ml in 20L of water – TRINITY GOLD 452 WP at 50g in 20L of water. 6. Mango Nutrition Flowering fruits, including mangoes, require proper nutrition to ensure quality yields. Proper flowering, fruit retention, and quality are influenced by several nutrients. i. Boron Deficiency – Symptoms: Flower and fruit abortion, cracking of fruit, leathery leaves, and brown areas in the fruit pulp. *Solution: – BOROZINC at 50ml in 20L of water – CALMABON at 50ml in 20L of water before flowering and during fruit development ii. Zinc Deficiencies – Symptoms: Little leaf symptom, small leaves, general dwarfness, and chlorotic foliage. *Solution: – ZINC GOLD at 20ml in 20L of water – BOROZINC at 50ml in 20L of water at all growth stages iii. Root Development/Immunity Booster *Solution: – LAVENDER TOTAL/WUXAL MACROMIX at 20 ml/20 liters during flushing and pinhead stages. iv. Fruit Quality and Ripening *Solution: – GOLDCHANCE SUPER FLOWERS AND FRUITS/EASYGRO FLOWER AND FRUITS/MUREX K at bud breaking, full bloom, and fruit maturity stages.
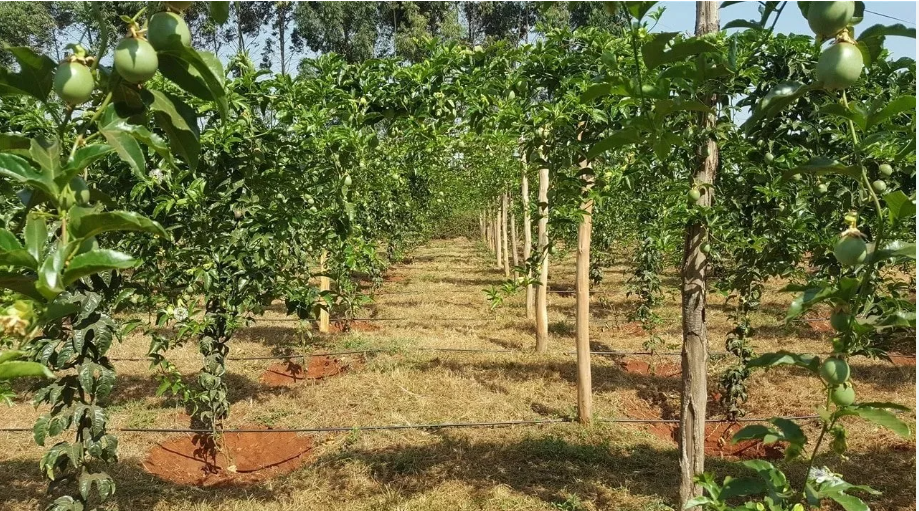
For every fruit farmer, one of the most exciting stages of production is seeing the trees develop a healthy flush followed by abundant flowering. However, flowering alone does not guarantee a good harvest. The real objective is to maintain a healthy tree, support flowering, improve fruit set, develop quality fruits and encourage continuous production after harvesting. A well-timed nutrition and crop protection program can help the farmer manage these critical stages more effectively. Stage 1: New Flush-Building a Strong Plant The first step is to ensure the tree develops a healthy and vigorous new flush. A strong canopy provides the foundation for successful flowering and subsequent fruit development. At this stage, topdress with NPK Yaramilla Winner(15:09:20+TE) or NPK 17:17:17to support vegetative growth and overall plant development. Foliar nutrition can also be applied using an appropriate product such as: ● Lavender Total ● YaraVita Crop Boost ● Maxigrow Foliar(24:24:18) ● Foliup ● Omex foliar(24:24:18) ● Algreen Supasense Or any suitable foliar feed recommended by your field extension officer. The objective at this stage is to establish healthy foliage and adequate plant vigor before moving into flowering. Stage 2: Flowering Induction Once the tree has developed a suitable new flush, the next objective is to encourage flowering induction. Products used for flowering induction may include: ● Azatone SL ● Plantone 4.5 SL ● Azatone “Y” Application should be guided by the specific fruit tree, product label recommendations and the prevailing crop condition. Stage 3: Pre-Flowering-Preparing the Tree for Fruit Set As the tree approaches flowering, adequate calcium, boron and zinc nutrition becomes important in preparing the crop for successful flowering and fruit set. At this stage, topdress with either: ● Calcibor, or ● Nitrabor For foliar nutrition, suitable options include: ● Zincabor ● Borozinc ● Cabozinc ● Calmabon ● Bonzin The crop should also be protected against pests and diseases that may interfere with flowering and fruit development. Where necessary, incorporate a suitable fungicide and insecticide based on the crop, pest or disease pressure and label recommendations. Stage 4: Fruit Set-Turning Flowers into Fruits This is one of the most critical stages of fruit production. The farmer's goal is no longer simply to have flowers, but to achieve a good fruit set and minimize unnecessary flower or young-fruit drop. At this stage, introduce high-potassium foliar nutrition to support fruit setting and the transition from flowering into early fruit development. Suitable options may include: ● YaraVita PowerBoost ● Maxigrow High-K ● Goldchance Super Flower and Fruit ● Easy Gro Flower/Fruit ● Omex Murex-K ● Algreen Super-K(6:0:42+TE) Good crop management during this stage is essential because nutrition alone cannot guarantee fruit set. Adequate moisture, successful pollination, pest and disease control and overall tree health also contribute significantly to the final outcome. Stage 5: Fruit Development Once fruits have successfully set, the focus shifts towards fruit enlargement, quality development and maintaining the strength of the tree. Continue with the appropriate High-K foliar nutrition program introduced during the fruit-set stage. At this stage, a suitable biostimulant can also be introduced to support plant vigor, fruit development and the tree's ability to withstand production stress. The nutrition program should be adjusted according to the crop's growth, fruit load and general condition rather than applying products unnecessarily. Stage 6: After the First Harvest-Supporting Regrowth and Continued Production Fruit harvesting places considerable demand on the tree. After the first harvest, the tree needs to recover and produce new growth that will support continued flowering and subsequent production. At this stage, topdress with Yara Winner NPK/NPK 17:17:17 to support regrowth, recovery and continued production. Finally, when applying the basal fertilizers; - Dig a 40 cm deep trench around Lthe canopy. - To determine the correct position, dig the trench at noon when the tree’s shadow aligns with the canopy edge. This ensures nutrients reach the active feeding roots. - Avoid digging too close to the stem as the roots near the stem serve as anchorage and do not absorb nutrients effectively
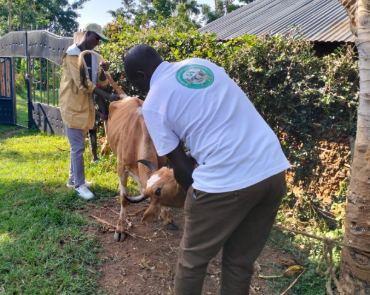
Mode of action: Paralyzes worms’ nervous system, making them expellable ○ Spectrum: Strong against roundworms and lungworms; less effective on flukes and tapeworms. ○ Market examples: Nilverm, Knockdown, Nilzan Super, Levas Extra, Nemarid, Super, Kapsole, Wormicid Plus-O, Nemarid Plus, Levas Diamond, Wormicid Liquid General Signs of Worm Infestation ● Loss of appetite and poor growth ● Diarrhoea (may contain blood/mucus) ● Swollen belly (“pot belly” in young animals) ● Pale gums and anaemia ● Rough hair coat and general weakness ● Bottle jaw (swelling under jaw due to Haemonchus contortus) ● Reduced milk yield and fertility ● Death in severe infestations
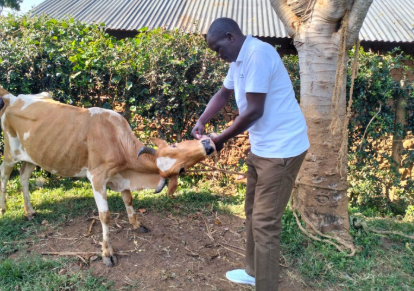
Mode of action: Blocks worm energy metabolism, leading to starvation and death. ○ Spectrum: Broad spectrum; effective against roundworms, some tapeworms,and adult liver flukes. ○ Market examples: Albafas, Trubenzole, Bovaloze, Albevas, Nefluk, Wormita, Dexoben General Signs of Worm Infestation ● Loss of appetite and poor growth ● Diarrhoea (may contain blood/mucus) ● Swollen belly (“pot belly” in young animals) ● Pale gums and anaemia ● Rough hair coat and general weakness ● Bottle jaw (swelling under jaw due to Haemonchus contortus) ● Reduced milk yield and fertility ● Death in severe infestations
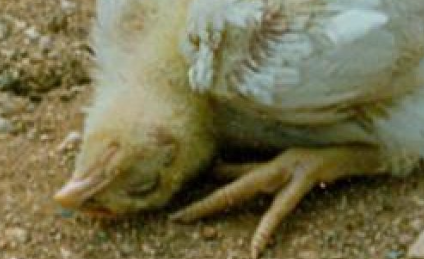
Cause: Avian paramyxovirus (NDV) Highly contagious, spread through direct contact, contaminated feed/water/equipment, clothing, and airborne transmission over short distances. The virus can survive for weeks in the environment. Clinical Signs ● Coughing, sneezing, rattling breathing ● Yellowish-green diarrhoea ● Nervous signs (tremors, twisted neck) ● Depression ● Drop in egg production, soft-shelled eggs Control & Prevention ● Vaccination ● Strict biosecurity: control access, disinfect footwear/vehicles, control vectors (wild birds, rodents, insects), maintain sanitation. ● No cure; provide supportive treatment.
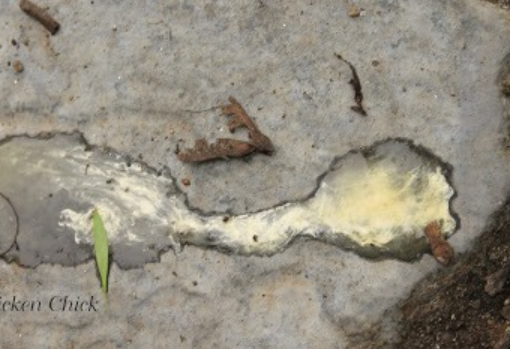
Cause: Salmonella Gallinarum Clinical Signs: Drowsiness Huddling Poor growth Watery or chalky white diarrhoea, often pasted around the vent Reduced egg production Treatment & Prevention: ● Treat with sulfonamides (1 ml or 1 g per litre of water for 3–5 days) or oxytetracycline/doxycycline (1 g per litre of water for 3–5 days). ● Use probiotics and supportive care (warmth, easy access to feed and water, stress reduction). ● Control rodent and biting fly populations. ● Practice biosecurity and vaccination.
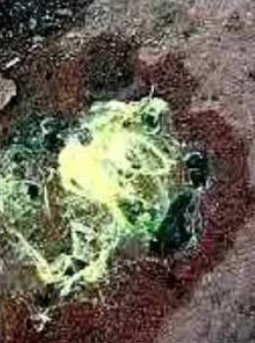
Cause: Pasteurella multocida This contagious bacterial infection ranges from acute septicaemia (blood poisoning) to chronic, localized infections. Clinical Signs: Swollen wattles with purplish discoloration Respiratory distress (coughing, sneezing) Yellowish diarrhoea Treatment & Prevention ● Treat with erythromycin or sulfadiazine at 1 g per litre of water for 3–5 days. ● Clean and disinfect poultry facilities regularly. ● Properly dispose of dead birds. ● Prevent contact with wild birds. ● Quarantine new birds before introduction.
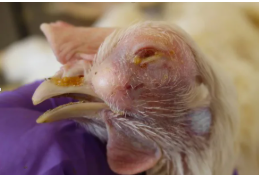
Also known as fowl coryza. Cause: Haemophilus paragallinarum Clinical Signs: Facial swelling Purulent ocular and nasal discharge Sneezing Treatment & Prevention: Treat with antibiotics such as oxytetracycline, tylosin, or trimethoprim at 1 g per litre of water, or enrofloxacin at 1 ml per litre of water. Good husbandry practices are essential. Best prevention is through strict biosecurity.